> ## Documentation Index
> Fetch the complete documentation index at: https://datagen.dev/llms.txt
> Use this file to discover all available pages before exploring further.
# Deploy Your Agent
> Deploy agents, skills, and commands from Claude Code or the web UI
Deploying an agent turns it into a cloud service that runs on webhooks, schedules, or manual triggers. Once deployed, your agent can create PRs, send notifications, and process data automatically.
**Using Claude Code?** Run `/datagen:deploy-agent` for a guided deployment workflow.
## Push to GitHub
Your agent needs to be in a GitHub repository before deploying.
```bash theme={null}
git add .claude/
git commit -m "Add agent definition"
git push origin main
```
If you don't have a remote yet:
```bash theme={null}
git init
git add .
git commit -m "Initial commit"
git remote add origin https://github.com/your-username/your-repo.git
git push -u origin main
```
***
## Deploy from Claude Code
Run the deploy command inside Claude Code:
```
/datagen:deploy-agent
```
The plugin will:
1. Scan your agent's dependencies (scripts, tools, secrets)
2. Connect your GitHub repo via the DataGen GitHub App
3. Push required secrets to DataGen
4. Create a webhook endpoint
5. Optionally set up cron schedules
After deployment, you get a webhook URL to trigger your agent externally.
***
## Deploy from the Web UI
### Step 1: Connect Your GitHub Repository
Navigate to the **Agents** page in DataGen.
Click **Connect Repository** to start the setup.
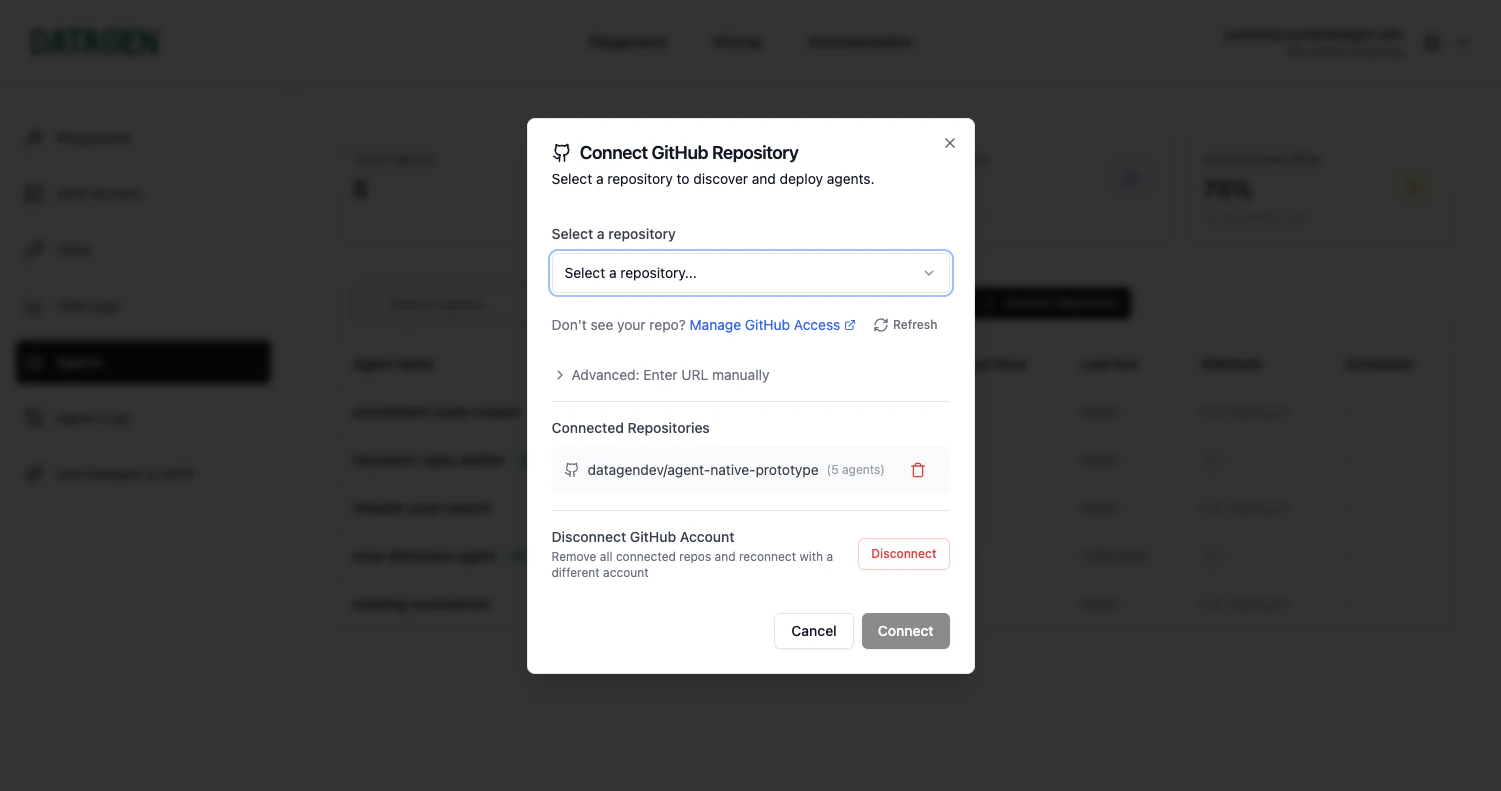 Click **Install GitHub App** and authorize DataGen to access your repositories.
Choose the GitHub account/organization and select the repositories you want to connect.
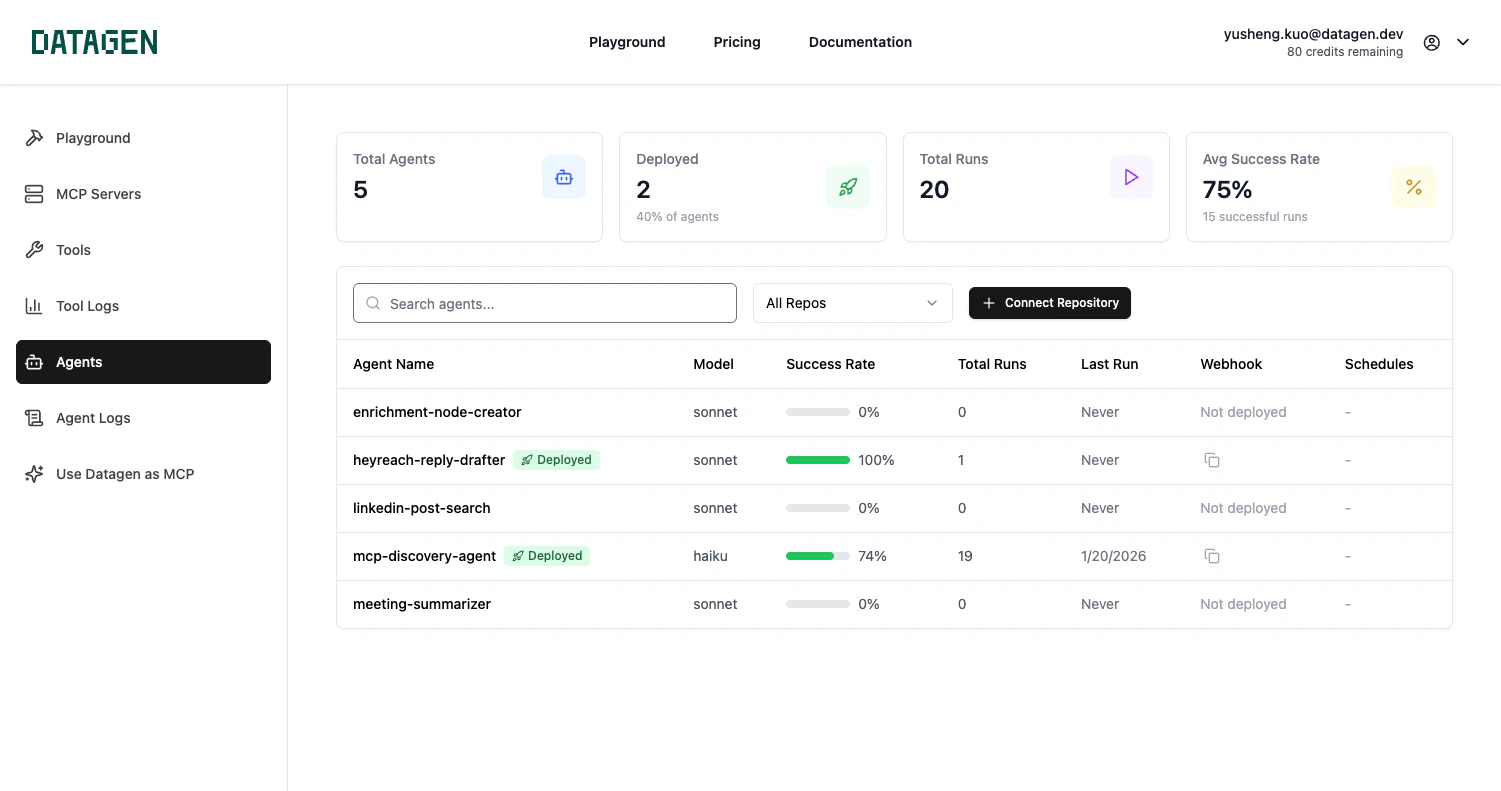
### Step 2: Deploy an Agent
DataGen automatically discovers agents, skills, and commands from your repository's `.claude/` directory.
Click on the agent you want to deploy from the list.
Click **Install GitHub App** and authorize DataGen to access your repositories.
Choose the GitHub account/organization and select the repositories you want to connect.
### Step 2: Deploy an Agent
DataGen automatically discovers agents, skills, and commands from your repository's `.claude/` directory.
Click on the agent you want to deploy from the list.
 Select which secrets your agent needs. You need either an Anthropic API key or a Claude Code subscription token.
**Option A: Anthropic API Key** -- Add `ANTHROPIC_API_KEY` in [DataGen Secrets](https://datagen.dev/account?tab=secrets).
**Option B: Claude Code Subscription (Recommended)** -- Run `claude setup-token` in your terminal, then add the token as `CLAUDE_CODE_OAUTH_TOKEN` in DataGen Secrets.
Select which secrets your agent needs. You need either an Anthropic API key or a Claude Code subscription token.
**Option A: Anthropic API Key** -- Add `ANTHROPIC_API_KEY` in [DataGen Secrets](https://datagen.dev/account?tab=secrets).
**Option B: Claude Code Subscription (Recommended)** -- Run `claude setup-token` in your terminal, then add the token as `CLAUDE_CODE_OAUTH_TOKEN` in DataGen Secrets.
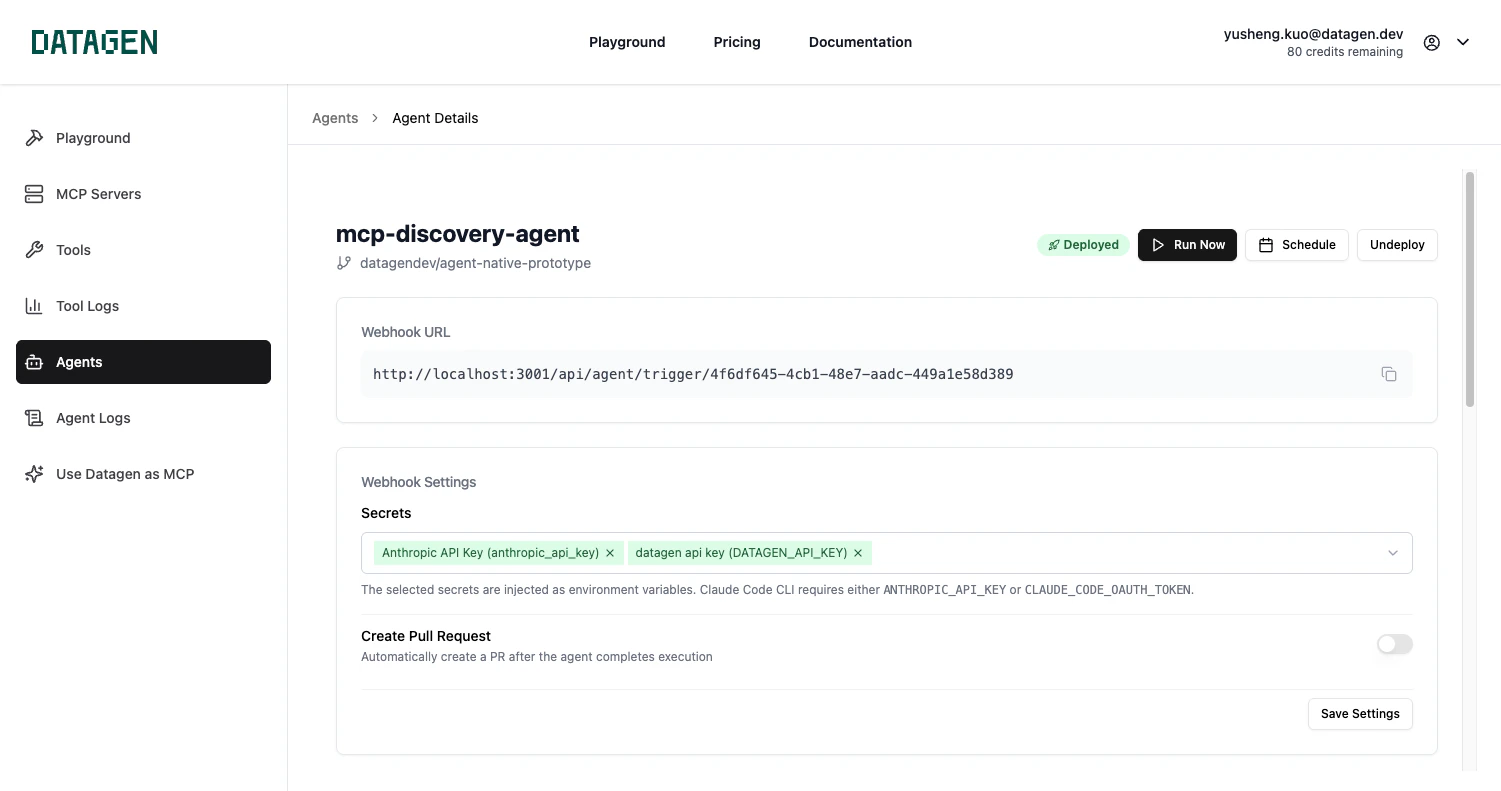 * **Create Pull Request** -- Enable if you want the agent to submit changes as PRs
* **Entry Prompt** -- Set a system-level instruction for every execution
Click **Deploy Agent** to create your deployment.
After deployment, copy the webhook URL for external integrations.
* **Create Pull Request** -- Enable if you want the agent to submit changes as PRs
* **Entry Prompt** -- Set a system-level instruction for every execution
Click **Deploy Agent** to create your deployment.
After deployment, copy the webhook URL for external integrations.
 ***
## After Deployment
Once deployed, your agent:
* Has a unique **webhook URL** for triggering via HTTP POST
* Appears in the **Agents** dashboard with run statistics
* Can be configured with [schedules](/guide/schedules), [channels](/guide/channels-overview), and additional secrets
## Troubleshooting
Make sure your agent file is at `.claude/agents/your-agent.md` and has been pushed to the main branch.
Ensure you've configured the required secrets (Anthropic API key or Claude Code OAuth token) and selected them during deployment.
Verify you have admin access to the repository. Try disconnecting and reconnecting the repo.
## Next Step
View execution logs, tool calls, and agent output
***
## After Deployment
Once deployed, your agent:
* Has a unique **webhook URL** for triggering via HTTP POST
* Appears in the **Agents** dashboard with run statistics
* Can be configured with [schedules](/guide/schedules), [channels](/guide/channels-overview), and additional secrets
## Troubleshooting
Make sure your agent file is at `.claude/agents/your-agent.md` and has been pushed to the main branch.
Ensure you've configured the required secrets (Anthropic API key or Claude Code OAuth token) and selected them during deployment.
Verify you have admin access to the repository. Try disconnecting and reconnecting the repo.
## Next Step
View execution logs, tool calls, and agent output