Why Deploy Your Agent?
You already built the agent. It works. But running it locally means it’s isolated from your systems—it can’t respond to events, run on a schedule, or integrate with your workflows. Deployed agents become part of your infrastructure:- Seamless integration - Your agent becomes a service that other systems can call
- Event-driven execution - React instantly to webhooks from Slack, GitHub, or any external system
- Scheduled automation - Daily CRM hygiene, weekly reports, hourly monitoring—all hands-free
Why Deploy with DataGen?
Deploying Claude Agent SDK yourself means configuring container sandboxes, managing MCP OAuth flows manually, and handling long-running process infrastructure. DataGen handles all of this - connect your GitHub repo and deploy with one click.Prerequisites
Create an Agent in Claude Code
Create an Agent in Claude Code
Use the
/agents command in Claude Code to create your agent. This creates an agent file at .claude/agents/your-agent.md.See the Claude Code sub-agents documentation for details on creating agents.Add MCP Capabilities (Optional)
Add MCP Capabilities (Optional)
Want your agent to use MCP tools like Google, LinkedIn, or other integrations?We currently only support MCP through DataGen. To add MCP capabilities to your agent, add your MCP servers through DataGen. This way, your MCP tools work both locally during development and in your deployed agent.
Push Your Repo to GitHub
Push Your Repo to GitHub
Your agent code needs to be in a GitHub repository.1. Create a new repository on GitHub:See the GitHub documentation for more details.
- Go to github.com/new
- Enter a repository name
- Leave “Initialize this repository with a README” unchecked
- Click Create repository
- After creating the repo, GitHub shows the remote URL
- Copy the HTTPS URL:
https://github.com/your-username/your-repo.git - Or use SSH:
git@github.com:your-username/your-repo.git
Step 1: Add DataGen GitHub App to Your Repo
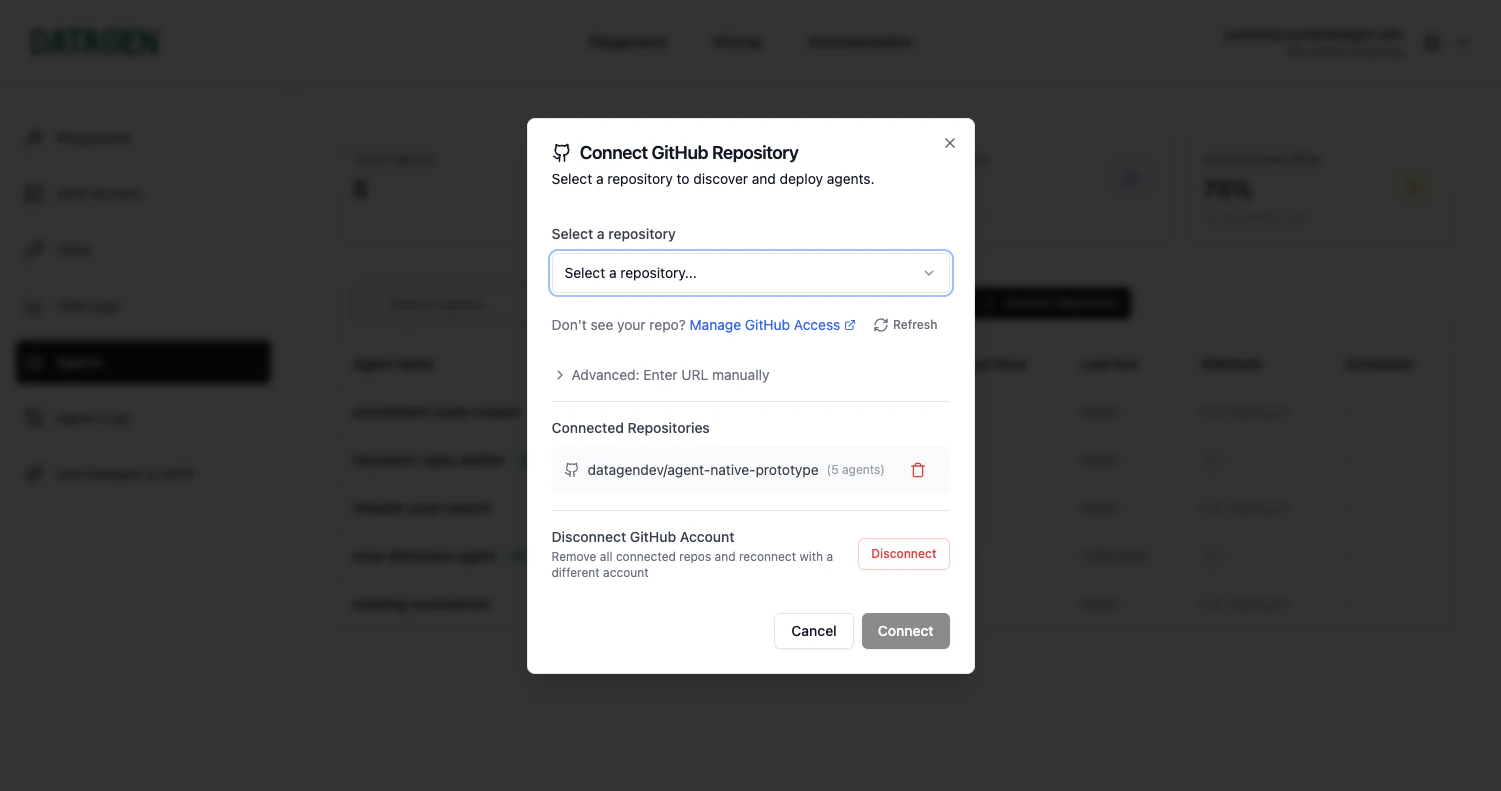
Select Account or Organization
Choose the GitHub account or organization where your agent repository lives.
Choose Repositories
Select the specific repositories you want to connect, or grant access to all repositories.
Step 2: Deploy an Agent
Select Your Agent
Click on the agent you want to deploy from the list. DataGen automatically discovers agents from your 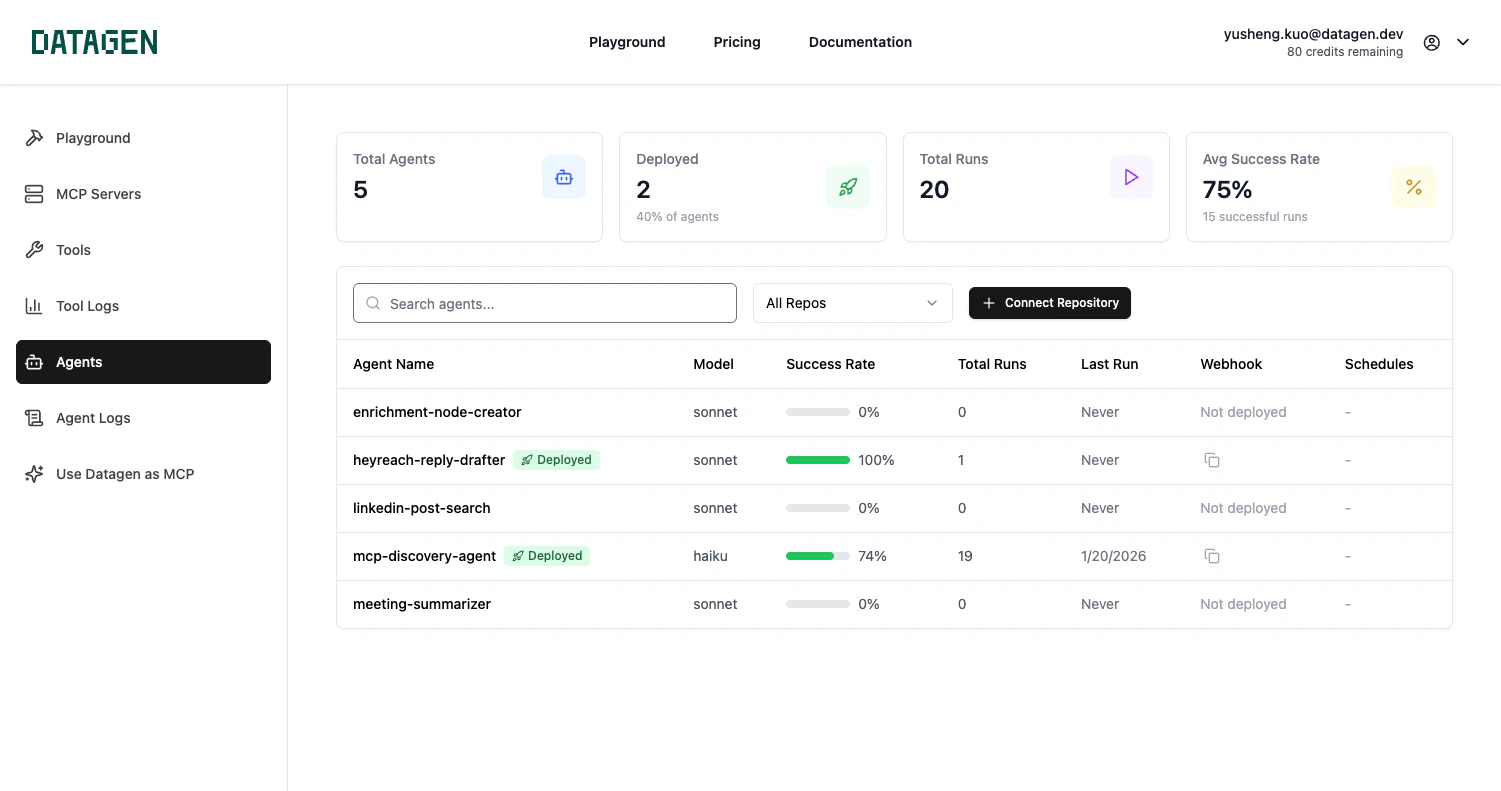
.claude/agents/ directory.Configure Secrets
Select which secrets your agent needs access to. You need either an Anthropic API key or a Claude Code subscription token.Option A: Anthropic API KeyAdd your 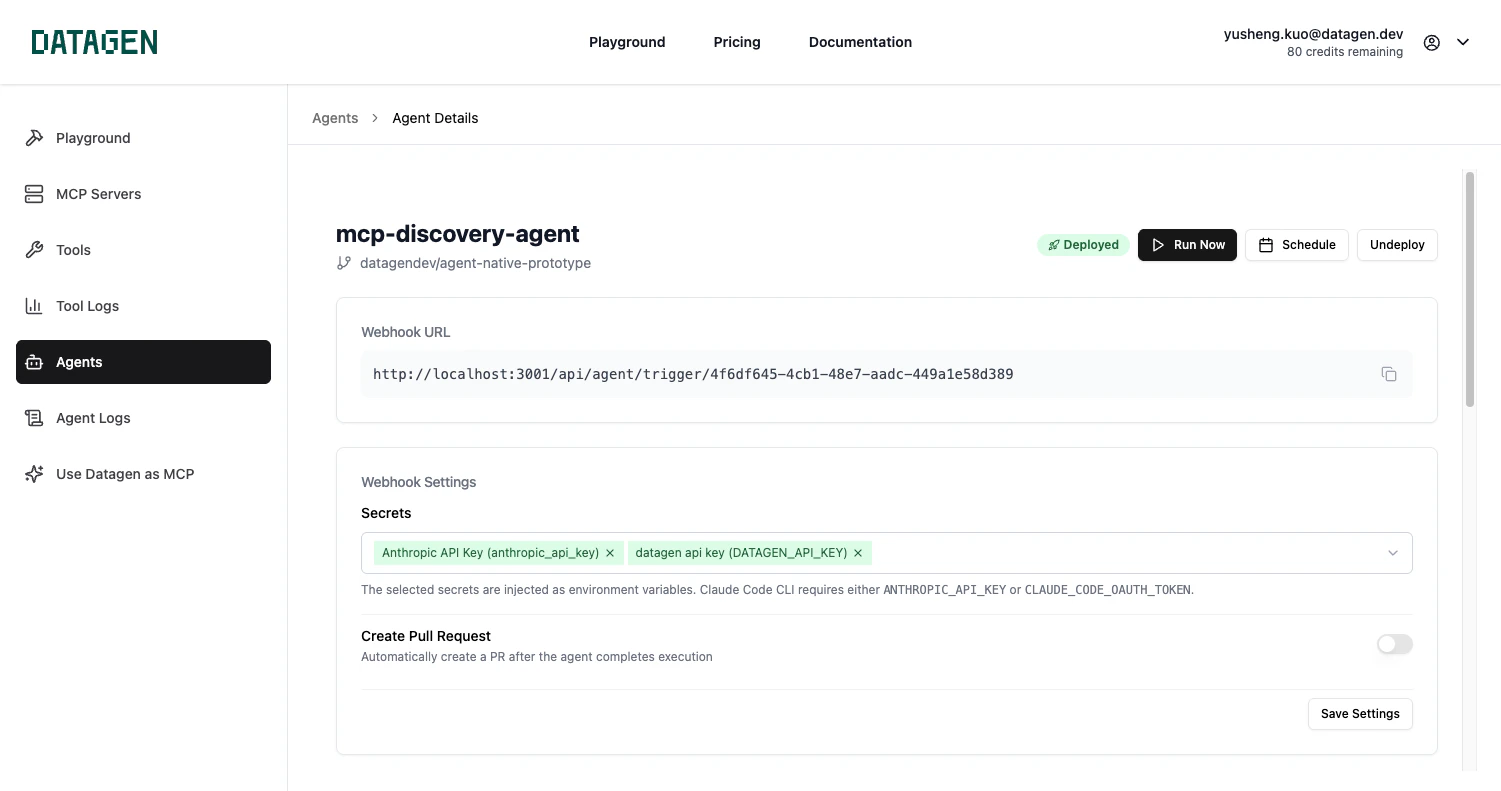
ANTHROPIC_API_KEY as a secret in DataGen Secrets.Option B: Claude Code Subscription (Recommended)If you’re a Claude Code subscriber, you can use your subscription instead of an API key:- Run
claude setup-tokenin your terminal to generate an OAuth token - Create a secret named
CLAUDE_CODE_OAUTH_TOKENin DataGen Secrets - Paste your token as the secret value
- Select this secret when deploying your agent
Toggle Create Pull Request (Optional)
Enable Create Pull Request if you want your agent to submit changes as PRs instead of committing directly.

Step 3: Trigger Your Agent
Once deployed, you have three ways to trigger your agent. Choose the method that fits your use case.- Schedule
- Run Now
- Webhook
Set up automatic recurring runs for your deployed agent.
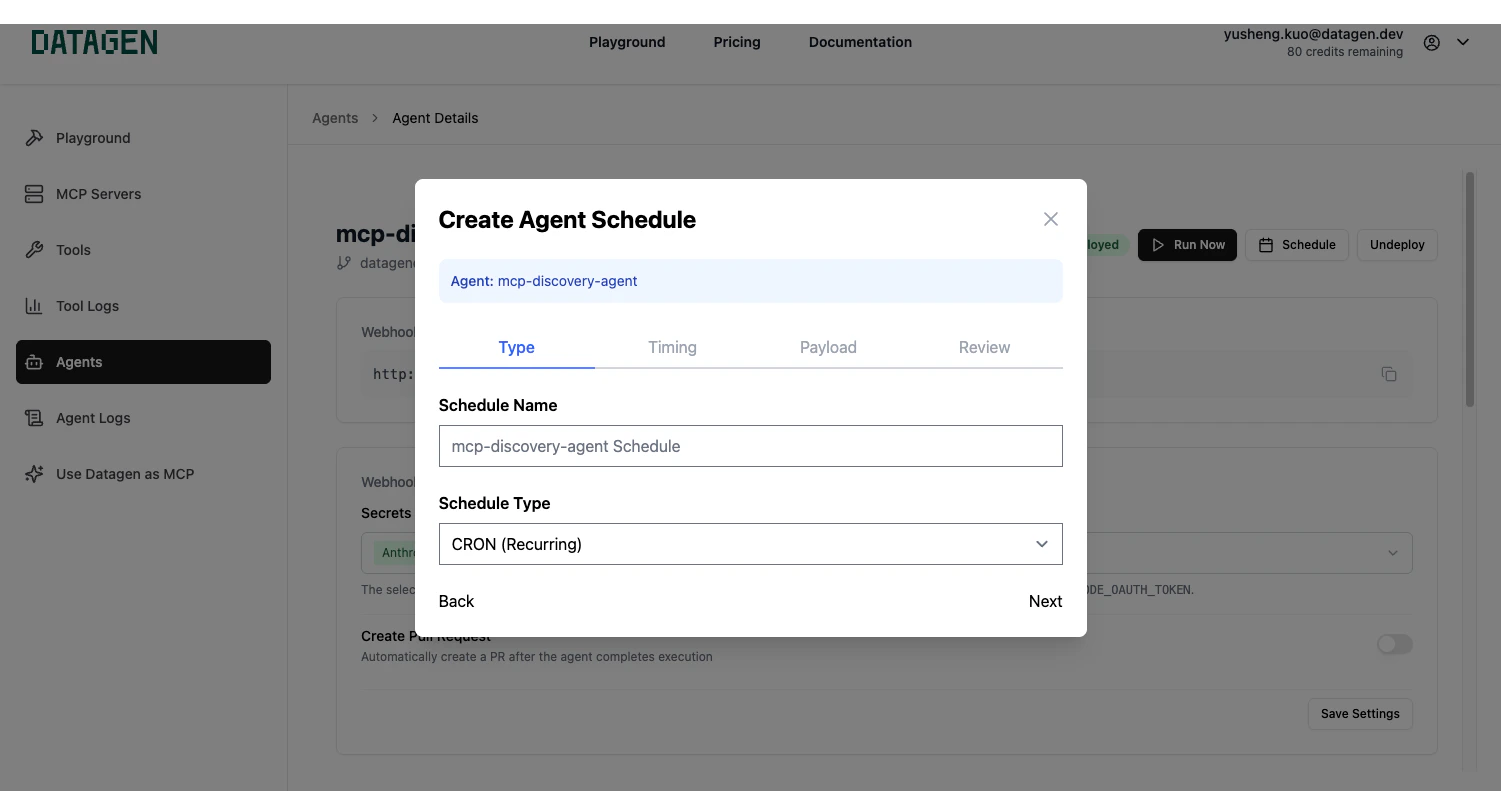
Choose Schedule Type
Select your preferred schedule:
- Hourly - Run every hour
- Daily - Run once per day at a specific time
- Weekly - Run on specific days of the week
- Custom - Define a custom cron expression

Step 4: View Execution History & Logs
Finding Your Logs
Click on a deployed agent to view its execution history. Each run shows:- Start time - When the execution began
- Duration - How long the run took
- Status - Current state of the execution
- Trigger - What initiated the run (schedule, manual, webhook)
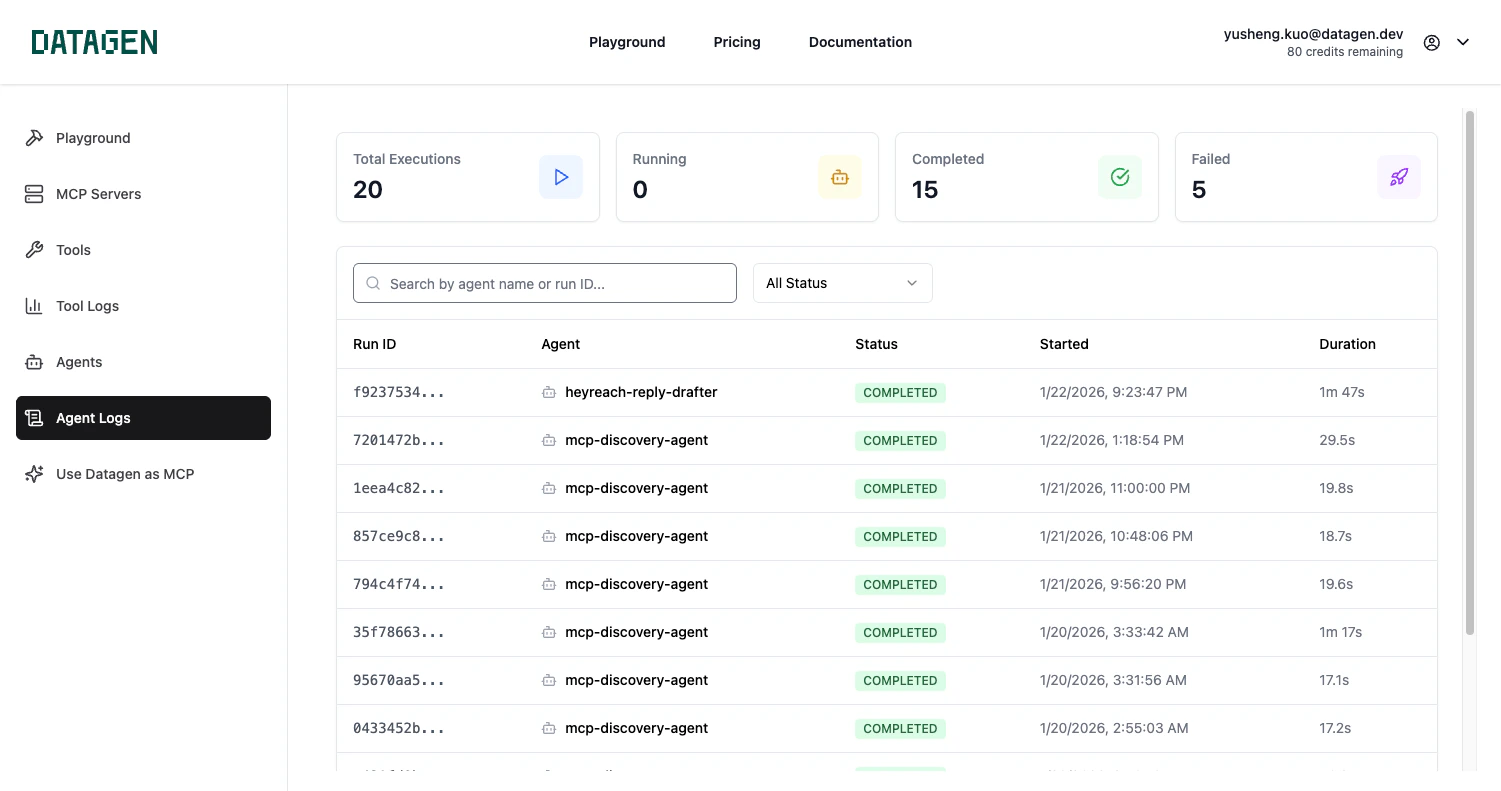
Understanding Status
| Status | Description |
|---|---|
| Queued | Run is waiting to start |
| Running | Agent is currently executing |
| Completed | Run finished successfully |
| Failed | Run encountered an error |
Viewing Pull Requests
If your agent creates PRs, you’ll see a link to the PR directly in the execution details.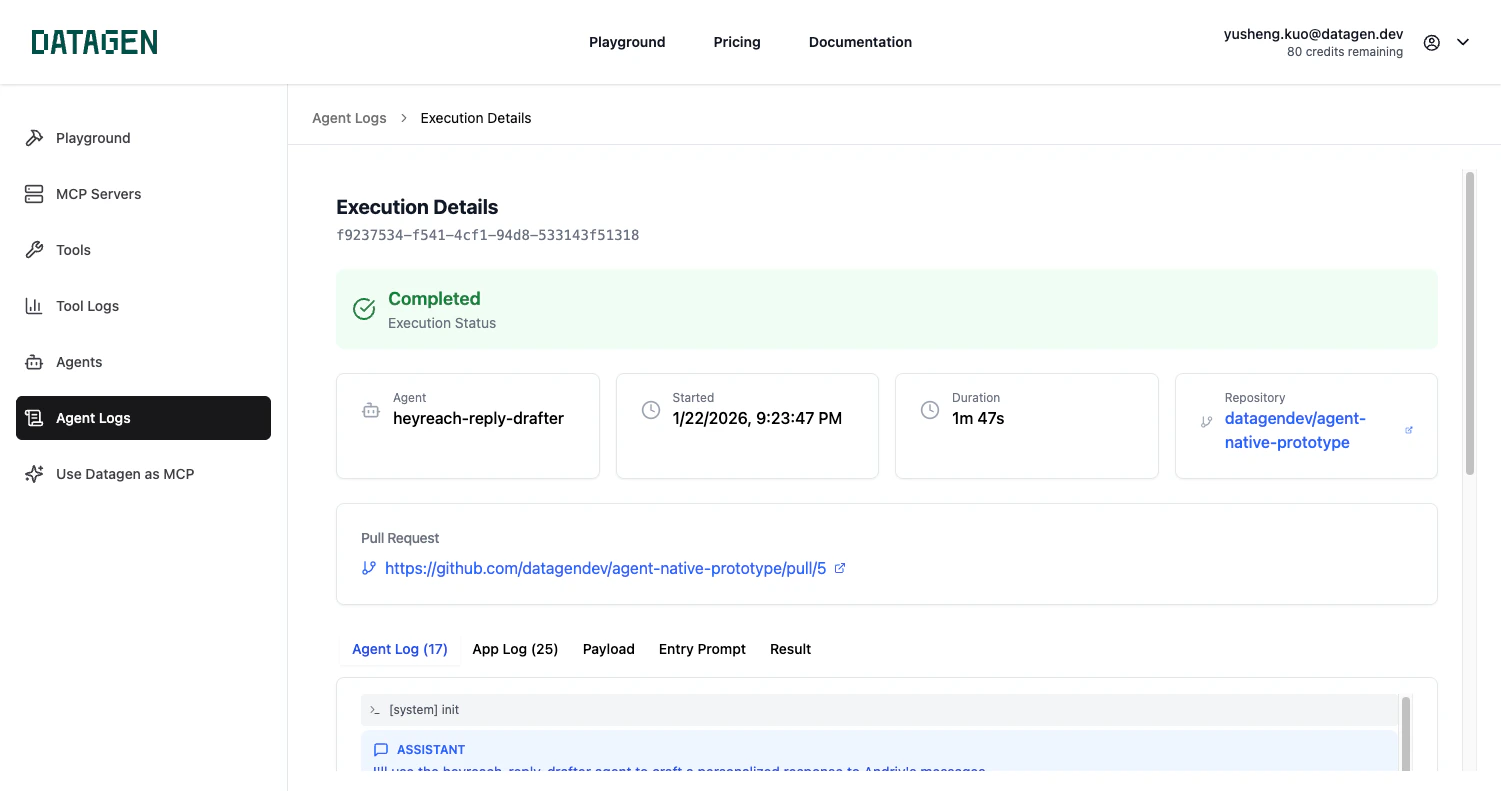
Troubleshooting
Agent not appearing after connecting repo
Agent not appearing after connecting repo
Make sure your agent file is located at
.claude/agents/your-agent.md in your repository and has been pushed to the main branch.Webhook returns 401 Unauthorized
Webhook returns 401 Unauthorized
Scheduled run didn't execute
Scheduled run didn't execute
Check that your schedule is active and the timezone is set correctly. View the execution history for any failed runs.
Agent fails with API key error
Agent fails with API key error
Ensure you’ve configured the required secrets (especially your Anthropic API key) and selected them when deploying the agent.